

Setting up a Presentation Builder - For Administrators
-
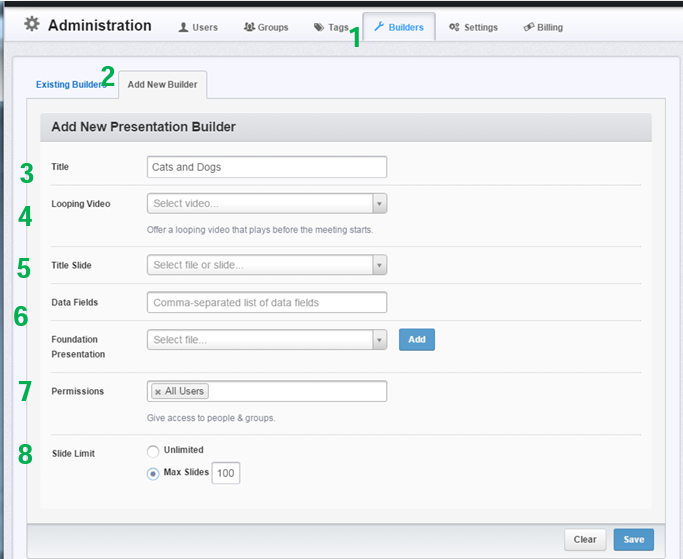
Go to Admin > Builder
-
Select Add New Builder
-
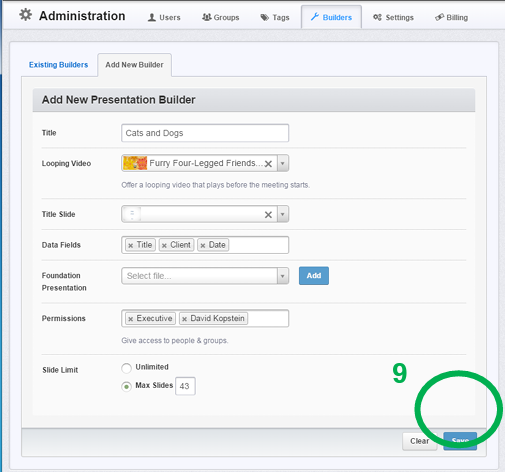
Enter a descriptive name for your builder, so your end-users can readily identify it, eg: Cats and Dogs
-
Optional: Looping Intro Video
Give your end-users the option of including an opening video with their presentation. Click in the Looping Video browser window, and select a video file from any of the folders, files within your Shufflrr site.
NOTE: All files must be uploaded to Shufflrr before you create your builder.
If you don’t want to include a video, just skip this step.

-
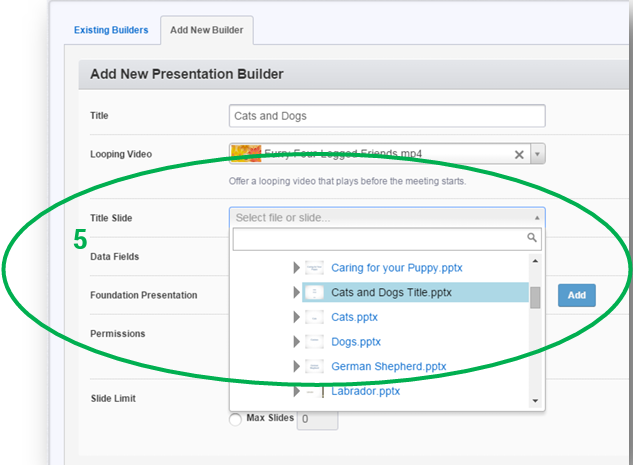
Optional: Title Slide & Data Fields
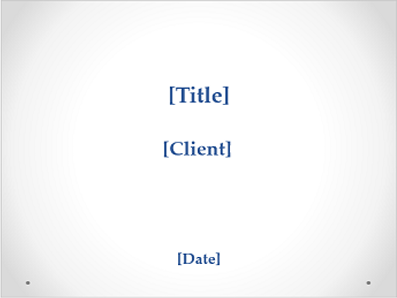
End-users can customize a title slide for their presentation. Insert a formatted Title Slide.pptx in this field.
Create your title slide in PowerPoint. Save a one slide PowerPoint file, e.g. Cats and Dogs Title.pptx, with the data fields as text in brackets. Each field is a separate text box. In this example, the Data Fields are: Title, Client and Date
The Data Fields on the slide, must be identical to the Data Fields in Shufflrr.
Upload Cats and Dogs Title.pptx to Shufflrr.

Click in the Title Slide browser window, and insert your title Slide, e.g. Cats and Dogs Title.pptx
-
Optional: Data Fields
The data fields you input in Shufflrr, must match those on the PowerPoint slide exactly. The case and syntax must be the same, no spaces. To enter your data field, keyboard click comma “,”

Notice how the Data Fields in Shufflrr’s builder match the Data Fields on the PowerPoint title slide created earlier.
-
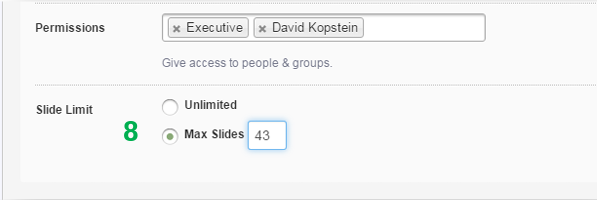
Assign Permissions: Determine which groups are individuals get access to a Presentation Builder. You can assign permissions by group and by individual users.
Go to Permissions > Type in the name of the group or user. Press enter.

-
Slide Limits: You can control the number of slides an end-user puts in his presentation. If he tries to go over the Slide Limit, the Presentation Builder will alert him with a message, pop-up window, and he will be prevented from doing so.
Go to Slide Limits > Select Max Slides > Input your slide limit
-
Save: (because it’s so easy to forget!).
The Save button is on the lower, right hand side of your screen.
We recommend Saving throughout the process.