


Updating Parent Presentations: Distributing Updates
Anyone who has write permissions to a folder can overwrite a parent presentation. If you can upload to a folder, you can overwrite a file, and therefore, distribute updated slides to all child presentations.
-
To overwrite a file, upload a file with the exact same file name, into the same folder (just like you would on your network). Shufflrr will look to the slide titles, and then look to the content on the slide, comparing the old content to the new content. When it sees different content, it will note that the slide has “changed.”
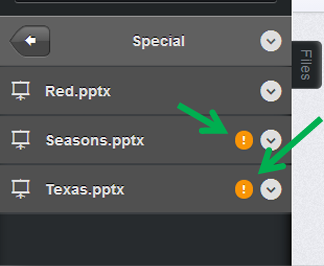
An updated presentation will be identified by an orange circle with an exclamation point next to the file name. In the example (shown to the right) the files, Seasons.pptx and Texas.pptx have changes. Clicking on one of these files will initiate the overwrite process, and force a side by side comparison of old, new and removed slides.
Clicking on a file with the overwrite alert next to it, to begin the overwrite process.
-
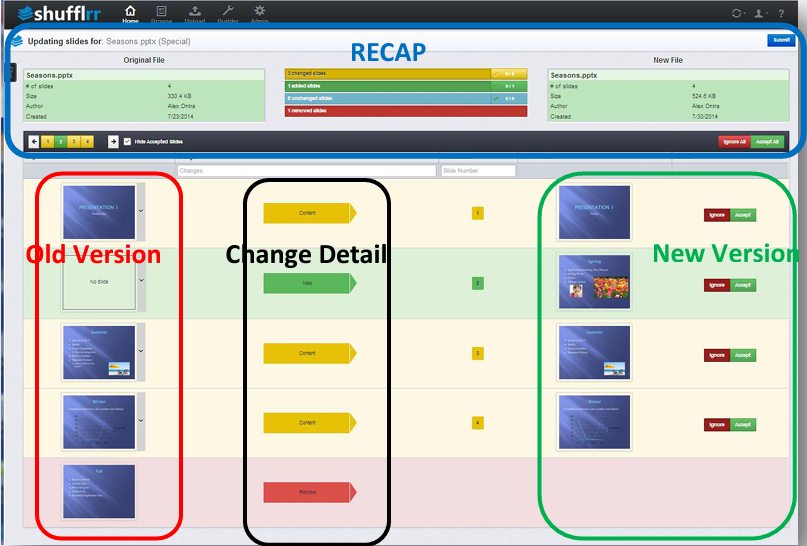
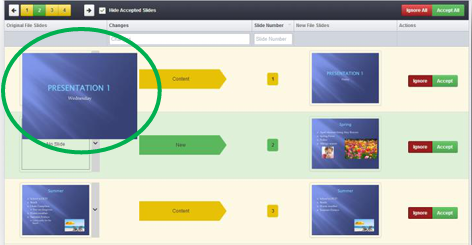
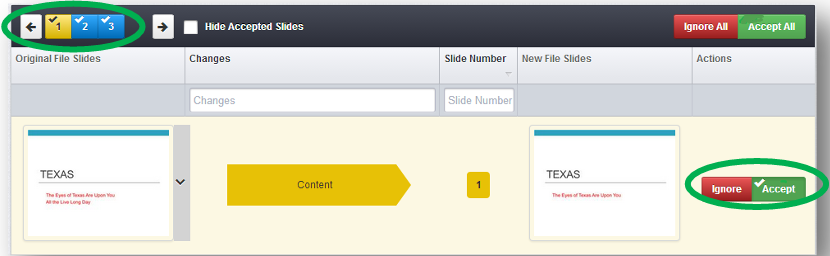
A side by side, or slide by slide, comparison window will open, identifying which slides have changed, stayed the same, been removed or added, when compared to the original file. Again, Shufflrr will look to the slide titles to identify the slides, and begin the comparison process.
-
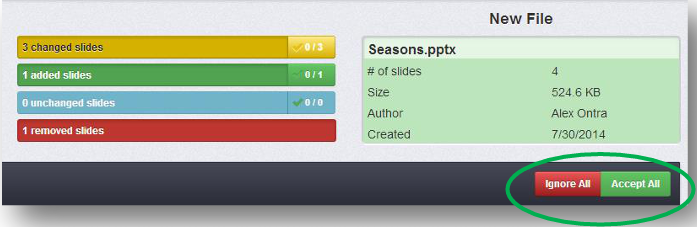
Recap
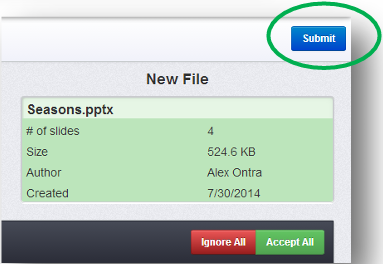
At the top of the screen, you will see a recap of the old versus new file, noting the presentations properties, such as number of slides, size of file, author and date created. The types of changes are color coded. Yellow denotes slides with content changes, green denotes new slides, blue is for unchanged slides, and red is for removed (i.e. deleted slides).
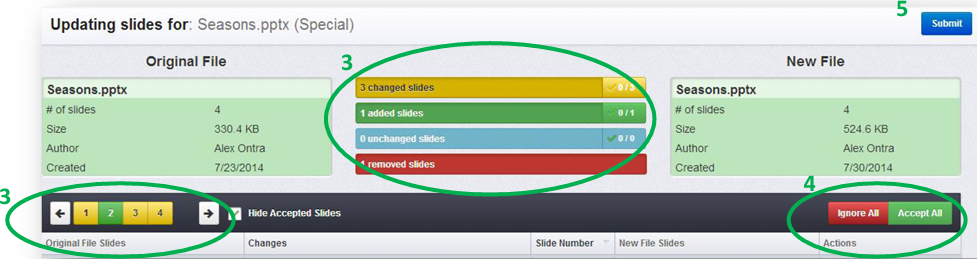
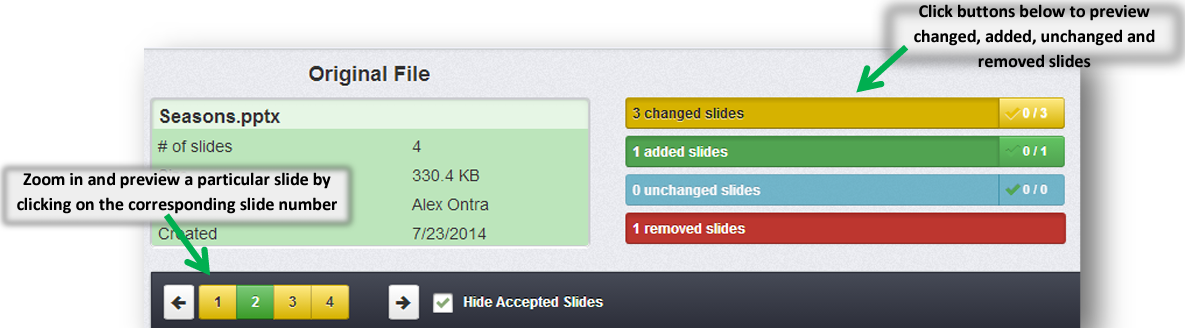
The recap also allows you to zoom into a specific set of slides, for example the changed slides or the added slides, without having to scroll through the entire presentation. And you can even zoom into individual slides, by selecting the slide number.
-
Ignore or Accept Changes
You can approve or ignore all changes in one step, without going reviewing the slides individually, by clicking Ignore All or Accept All buttons at the bottom right of the recap.
-
Slide by Slide Comparison
To review the specific slide changes, and Accept or Ignore them individually, simply scroll down and go through each slide. Each type of change is color coded and noted.
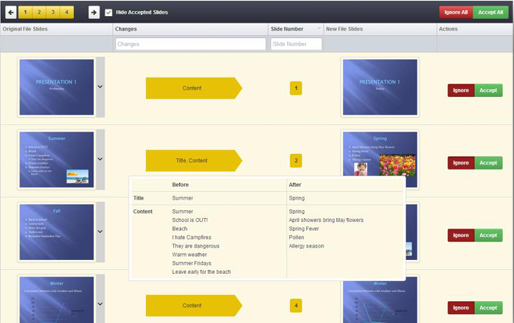
- a) Changed Slides – Shufflrr identifies text changes, within text boxes, speaker notes and charts. It does not currently recognize image and video changes. But you can implement those by manually Accepting those slides with the changes.
Enlarge thumbnail by hovering over it with your mouse.
Review hard copy, content changes by hovering over the type of change arrow in the middle.
-
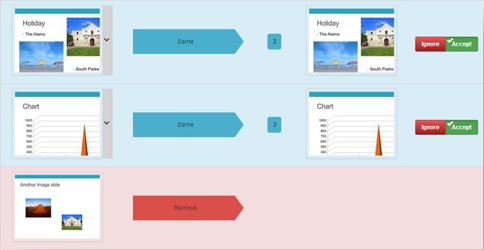
b) Removed Slides – Removed slides are identified, but you cannot accept or ignore the change within Shufflrr. If you accidentally removed/deleted a slide from your updated presentation and want to reverse it. You have three options.
- Change the file on your local computer. The, re-upload.
- Download the original file from Shufflrr. Edit your changes, and then re-upload.
- Use the Archive/History feature to roll back to an earlier version
-
c) Added Slides – New slides will appear in the parent presentation, but will not, cannot, be pushed out to child presentations, as they do not exist in child presentations. In that case of Added Slides, there is nothing to update.
-
d) Unchanged Slides – That’s easy. There are no changes, so there is no action to take.
-
e) Accept or Ignore Change – After you have reviewed a slide, choose the Accept or Ignore button to the right of the updated slide. A check mark will appear, and the corresponding slide number will also have a check mark
-
Submit
- a) When you have reviewed all of your slides, and have accepted or rejected/ignored slide changes, click Submit which will start the process of distributing the changes out to child presentations.
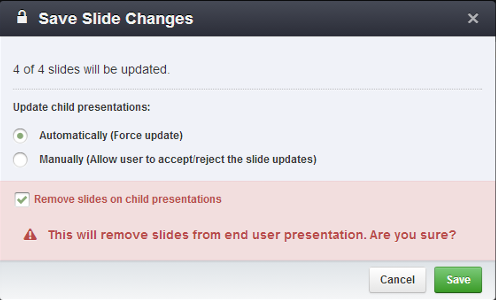
- b) Choose Automatic or Manual Updates.
Automatic updates – Force the changes into child presentations. The end-user is notified of the change via email. When he logs into Shufflrr, the updated presentation will be ready for us.
Manual updates – Allow the user to review the side by side, slide by slide, comparison described in the previous steps 5 and 6, and choose whether or not he wants to take the updated slides, or leave his presentation in its original form.
NOTE: If the end-user ignores the update, then the parent – child relationship is broken, and that slide will no longer receive updates when/if that parent receives another update in the future.
Remove slides – The Save Slide Changes window prompts a the user to confirm whether or not he wants to remove/delete slides from child presentations. Deleting an entire slide, from someone else’s presentation, could prove problematic for that person. So, Shufflrr just asks a second time to be extra sure.